12 Hidden Android Settings That Secretly Unlock Features Your Phone Manufacturer Disabled
Your Android phone is holding out on you, and your manufacturer knows it.
Right now, buried inside your device is a collection of settings, menus, and controls that Samsung, Xiaomi, OnePlus, and others have quietly tucked away, either to simplify the experience for casual users or, let’s be honest, to nudge you toward an upgrade you don’t actually need. The terrifying part? Most Android users spend years with a phone that’s running at maybe 60% of its real potential.
This isn’t a conspiracy theory. It’s just how the industry works. Manufacturers build phones with dozens of advanced features, then lock or hide the ones they think “average users” won’t need. The result is a device that feels slower, less customizable, and more restrictive than it actually has to be.
The good news: none of those restrictions are permanent.
Whether you’re using a flagship Samsung Galaxy, a budget Redmi, or a stock Pixel, there are hidden Android settings you can unlock right now, without rooting your device or voiding your warranty. Some of these take 30 seconds to activate. Others require diving a few menus deep. All of them will change the way you use your phone.
According to a 2024 survey by Android Authority, roughly 30% of Android users actively prefer customized interfaces for productivity, yet the vast majority never discover the tools to get there.
By the end of this post, you will know exactly which settings to unlock, where to find them, what each one does, and how to use them without breaking anything. Let’s get into it.
Why Your Manufacturer Hides These Hidden Android Settings in the First Place
Before diving into the settings themselves, it helps to understand why they’re hidden.
Phone manufacturers operate under a specific business logic. They want their devices to feel approachable to as many people as possible. Advanced settings that confuse a first-time smartphone buyer can lead to bad reviews, support calls, and returns. So they hide the complex stuff, not because it’s dangerous, but because it’s not for everyone.
There’s also a commercial incentive at play. Some features, like extended battery controls or deep app management, could reduce the frequency with which users buy new phones. A phone that runs smoothly for five years is less profitable than one that feels sluggish by year three.
Research published by the World Economic Forum on sustainable technology consumption highlights that consumer electronics companies often design products around planned obsolescence cycles, and software limitations are a key part of that strategy.
Carrier customization adds another layer. In many markets, including the U.S., phones sold through carriers like Verizon or AT&T ship with modified software that further limits certain features, especially anything related to network switching, hotspot controls, or developer access.
The result is that the Android phone in your pocket is a bit like a sports car with the speed limiter permanently engaged. It can go faster. It’s built to go faster. The limiter is just there by policy, not necessity.
Here’s the important caveat: some settings are hidden for legitimate safety reasons. Features inside Developer Options, for instance, were originally designed for software engineers testing apps. They’re powerful, and a few of them can genuinely destabilize your device if you flip the wrong switch without understanding what it does.
This guide focuses only on the settings that are safe, practical, and genuinely useful for everyday users. Each one comes with a plain-English explanation of what it does, how to find it, and exactly what you should and shouldn’t touch.
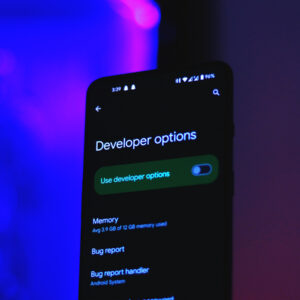
Setting 1: Developer Options, The Master Key to Hidden Android Settings
Here’s the single most valuable thing you can do with your Android phone today: unlock Developer Options.
Developer Options is a hidden menu that Google built into every Android device for app developers to test their work. Google hides it by default because it contains settings that could confuse a non-technical user. But it also contains some of the most powerful customization tools on any smartphone, tools that directly improve speed, Bluetooth audio, battery life, and multitasking.
How to Unlock It
The process is the same on almost every Android phone:
- Open Settings
- Tap About Phone (on Samsung, go to About Phone > Software Information)
- Find Build Number
- Tap it seven times in a row
- Enter your PIN when prompted
- You’ll see the message: “You are now a developer!”
Go back to your main Settings menu. A new item called Developer Options will appear, usually near the bottom or inside the System menu. Tap it, and make sure the master toggle at the top is switched on.
From here, you unlock access to everything else on this list, and then some.
One important rule: Only change settings you understand. The Developer Options menu has dozens of toggles. Most are safe to experiment with, but a handful, like OEM Unlocking or USB Debugging left open in public, carry real risks. When in doubt, leave it alone.
Setting 2: Kill the Animation Tax and Make Your Phone Feel Twice as Fast
This one will genuinely shock you the first time you do it.
Every time you open an app, switch between screens, or dismiss a notification, Android plays a tiny animation. These transitions look polished, but they also make your phone feel slower than it is. That quarter-second fade between apps adds up to seconds of waiting every day, and on older or mid-range devices, it becomes noticeably painful.
Inside Developer Options, there are three settings that control this:
- Window Animation Scale
- Transition Animation Scale
- Animator Duration Scale
All three are set to 1x by default. Change them all to 0.5x and your phone will feel dramatically snappier within seconds. Everything opens faster, closes faster, and responds faster. No hardware upgrade required.
If you want to remove animations entirely, set all three to Off. It makes some interactions feel slightly abrupt, but on an older device, it can transform a sluggish experience into something surprisingly responsive.
Time saved: Easily 10 to 20 minutes of accumulated wait time per day on heavily used devices, and the subjective experience improvement is immediate.
This is the hidden Android setting that tech enthusiasts share every time someone complains about their phone feeling slow. Now you know it too.
Setting 3: Fix Your Bluetooth Audio Quality With One Hidden Toggle
If you use Bluetooth headphones or speakers with your Android phone, your audio quality is almost certainly being capped by a setting you’ve never seen.
By default, Android uses Absolute Volume, which links your phone’s volume slider directly to your Bluetooth device’s volume. It sounds convenient, but it creates a frustrating problem: the volume levels often don’t match up cleanly. You end up with audio that’s either too loud at low settings or weirdly capped before your headphones hit their maximum output.
Inside Developer Options, look for Disable Absolute Volume and toggle it on.
Once disabled, your phone and your Bluetooth device each have their own independent volume controls. You can now fine-tune the audio precisely, which matters when you’re trying to listen quietly in bed or push headphones to their actual maximum volume in a noisy environment.
There’s a second Bluetooth upgrade hiding in Developer Options: Bluetooth Audio Codec. By default, most Android phones use SBC, the lowest-quality Bluetooth audio codec. If your headphones support it, switch this to aptX, aptX HD, or LDAC for a significant improvement in audio fidelity.
How to find it: Developer Options > Bluetooth Audio Codec > select the highest option your headphones support.
Who benefits most: Anyone using premium wireless headphones who’s wondered why their expensive audio gear sounds mediocre through their phone.
Setting 4: The Privacy Dashboard Your Phone Hid From You
This one isn’t inside Developer Options. It’s hiding in plain sight inside your standard Settings menu, and most users scroll past it without a second glance.
The Privacy Dashboard (available on Android 12 and later) is a real-time log of every app that has accessed your camera, microphone, location, contacts, or other sensitive data, and exactly when they accessed it.
How to find it: Settings > Privacy > Privacy Dashboard
What you’ll see will likely surprise you. Apps you haven’t opened in weeks showing up in the log. Social media apps that accessed your microphone at odd hours. Games that pinged your location in the background.
From this screen, you can revoke permissions for any app instantly without having to hunt through individual app settings. It’s one of the most powerful privacy tools on Android, and most users have never opened it.
Actionable step: Open Privacy Dashboard right now and look at the last 24 hours of access logs. If any app accessed your microphone or camera without an obvious reason, revoke that permission immediately.
[INTERNAL LINK: Android Privacy Settings: The Complete Guide to Locking Down Your Data]
Setting 5: Force GPU Rendering and Unlock Smoother Visuals on Older Phones
Your Android phone has two processors doing different jobs: the CPU handles general computing tasks, and the GPU handles graphics. By default, Android uses the CPU to render 2D interface elements like app lists, scrolling menus, and text. On modern flagship phones, this is fine. On older or mid-range devices, it creates unnecessary lag.
Inside Developer Options, find Force GPU Rendering (sometimes listed as “Force 4x MSAA” or “Hardware-accelerated rendering”) and switch it on.
This forces Android to offload 2D rendering tasks to the GPU, which is purpose-built for visual processing. The result is smoother scrolling, more responsive menus, and a generally snappier interface.
One caveat: This setting trades battery life for performance. The GPU consumes more power than the CPU for these tasks, so you may notice a small reduction in battery life. On a newer device with an efficient processor, the impact is minimal. On a very old phone, weigh the trade-off.
Best for: Android devices two to four years old that have started to feel sluggish but still have solid battery life.
Setting 6: Background App Limits, Stop Your Phone From Running Apps You Forgot About
Here’s a hidden Android setting that directly impacts both battery life and performance, and manufacturers rarely tell you it exists.
Android keeps a certain number of apps running in the background at all times, ready to be opened quickly. This is convenient, but it’s also quietly draining your battery and consuming RAM that could be used by apps you’re actually running.
Inside Developer Options, find Background Process Limit. By default, it’s set to the standard limit, which allows a relatively large number of background apps. You can manually reduce this.
Options include:
- Standard Limit (default): Android decides how many apps to keep running
- At Most 4 Processes: Good for most mid-range phones
- At Most 3 Processes: Better for phones with 4GB of RAM or less
- At Most 2 Processes: Best for older devices with limited memory
- No Background Processes: Aggressive, best only for very old devices
Reducing this number forces Android to manage memory more aggressively, which means better battery life and more RAM available for the apps you’re using right now.
Important note: Setting this too low can make app-switching feel slower because apps have to fully reload instead of resuming. Start with one step below the default and see how it feels.
Setting 7: Smart Lock, The Hidden Feature That Stops You Unlocking Your Phone 100 Times a Day
Most people unlock their phone somewhere between 80 and 150 times per day. That’s not an exaggeration. Research from behavioral analytics firm Dscout found that heavy users interact with their phones over 5,000 times daily, and a significant portion of those interactions begin with unlocking the device.
Smart Lock is Android’s answer to this problem, and it’s been hiding in your settings since Android 5.0.
Smart Lock lets you define trusted conditions under which your phone stays unlocked automatically. Options include:
- Trusted Places: Your phone stays unlocked when you’re at home or the office (using GPS)
- Trusted Devices: Your phone stays unlocked when connected to a specific Bluetooth device, like your smartwatch or car stereo
- On-Body Detection: Your phone stays unlocked while it detects you’re carrying it, and locks when you set it down
How to find it: Settings > Security > Smart Lock
You’ll need to enter your PIN once to access it, then set up your preferred conditions. From that point, your phone will unlock automatically in trusted environments while maintaining full security everywhere else.
Who benefits most: Anyone who works from home, commutes with Bluetooth earbuds, or simply finds constant unlocking to be one of the more tedious parts of their day.
Setting 8: The System UI Tuner, Your Secret Interface Control Panel
The System UI Tuner is one of the most hidden Android settings that Google added and then quietly stopped publicizing. It gives you direct control over the status bar at the top of your screen, including which icons appear, how the battery indicator displays, and how Do Not Disturb behaves.
How to access it on stock Android:
- Pull down the notification shade fully
- Press and hold the gear icon (Settings) for about five seconds
- You’ll see a wrench icon appear, or a notification saying “System UI Tuner has been added to Settings”
- Find it at the bottom of your Settings menu
Once inside, you can:
- Remove status bar icons you never use (Bluetooth, alarm, hotspot)
- Switch between battery percentage, icon, or hybrid display styles
- Get finer control over notification display behavior
- Enable or disable the Do Not Disturb quick tile
Samsung users: Samsung’s One UI doesn’t support System UI Tuner in the same way. Some options are available through Settings > Notifications > Status Bar instead.
What to do first: Remove the icons you never look at. A cleaner status bar means less visual clutter and a more focused screen.
Setting 9: Pin a Screen for Privacy Without Locking Your Phone
Imagine handing your phone to a friend to show them a photo, and knowing with absolute certainty that they can’t swipe into your messages, your camera roll, or your apps.
Screen Pinning does exactly this. It locks your phone to a single app until you enter your unlock code to exit. The person holding your phone can interact with whatever app is pinned, and nothing else.
How to enable it: Settings > Security > Screen Pinning (toggle it on)
How to pin an app:
- Open the app you want to pin
- Tap the recent apps button (the square or gesture swipe)
- Tap the app’s icon at the top of its card
- Select Pin
To unpin, hold the back and recent apps buttons simultaneously (or use the gesture equivalent on newer phones).
Bonus use case: Screen Pinning is also invaluable for parents handing a phone to a child. Pin a YouTube Kids video or a specific game, and the child literally cannot navigate anywhere else.
Setting 10: Notification History, Recover Dismissed Alerts You Actually Needed
You’ve done it. Everyone has done it. You swiped away a notification before reading it, realized a second later you needed that information, and had no way to get it back.
Notification History is a hidden Android setting that logs every notification your phone has received in the last 24 hours, including ones you already dismissed. It’s been available since Android 11, and a surprising number of users have never turned it on.
How to enable it: Settings > Notifications > Notification History > toggle Use Notification History on
Once enabled, you’ll find a running log of every notification, organized by app and timestamp. Dismissed alerts, missed calls, messages you swiped away too fast, they’re all there.
One practical tip: This feature doesn’t activate retroactively. It only logs notifications from the moment you turn it on. Enable it now so it’s ready the next time you need it.
Setting 11: Focus Mode for Productivity, Lock Out Distracting Apps Without Deleting Them
This is Android’s built-in productivity weapon, and it’s buried in a menu most people only visit by accident.
Focus Mode, available inside Digital Wellbeing and Parental Controls, lets you pause specific apps for a set period. When an app is paused, its icon is grayed out, notifications are silenced, and you can’t open it until Focus Mode ends or you manually turn it off.
How to find it: Settings > Digital Wellbeing & Parental Controls > Focus Mode
You choose which apps to pause, social media, games, streaming services, email, whatever drains your attention. Then you activate Focus Mode manually or set a schedule.
The difference between Focus Mode and simply muting notifications is significant: paused apps don’t just go quiet, they become inaccessible. That extra friction is exactly what breaks the habit loop of reflexively opening Instagram or TikTok when your brain wants a distraction.
What happens when you skip this: Research from the University of California, Irvine found that it takes an average of 23 minutes to fully regain focus after an interruption. Every social media notification that breaks your concentration is costing you far more than the two seconds it takes to read it.
Actionable setup: Identify your three biggest distraction apps. Add them to Focus Mode. Set a daily schedule from 9 AM to 12 PM. Test it for one week and see how differently your mornings feel.
Setting 12: Private DNS, The Hidden Network Setting That Blocks Ads and Protects Your Browsing
This last setting is the most technical on the list, but stick with it. The payoff is significant.
By default, when your phone looks up a website, it uses your internet provider’s DNS server, essentially a directory that translates website names into actual IP addresses. Your ISP’s DNS server logs these requests, meaning your browsing habits are visible to your provider. It’s also slower than it needs to be.
Android has a built-in Private DNS setting that lets you replace your ISP’s DNS with a faster, more private alternative. Some Private DNS servers also block ads and trackers at the network level, meaning ads disappear across every app and browser on your phone, without any additional app required.
How to set it up: Settings > Network & Internet > Private DNS > Select “Private DNS Provider Hostname” > Enter your preferred DNS hostname
Popular free options include:
- Cloudflare’s 1.1.1.1 for Families (blocks malware and adult content):
family.cloudflare-dns.com - AdGuard DNS (blocks ads across all apps):
dns.adguard-dns.com - NextDNS (highly configurable, free tier available):
[your custom hostname].dns.nextdns.io
What this actually changes: Faster page loads, fewer ads in more places, and your ISP can no longer see which websites you’re visiting.
Who should enable this: Everyone. This is the one setting on this list that offers the most upside with the fewest downsides.
Comparison Table: All 12 Settings at a Glance
| Setting | Where to Find It | Difficulty | What It Unlocks | Risk Level |
|---|---|---|---|---|
| Developer Options | Settings > About Phone > Build Number (tap 7x) | Easy | Master key to all advanced settings | Low |
| Animation Scale | Developer Options > Window/Transition/Animator Duration Scale | Easy | Dramatically faster feel | Low |
| Disable Absolute Volume | Developer Options > Disable Absolute Volume | Easy | Better Bluetooth audio control | Very Low |
| Bluetooth Codec | Developer Options > Bluetooth Audio Codec | Easy | Higher audio quality | Very Low |
| Privacy Dashboard | Settings > Privacy > Privacy Dashboard | Easy | Real-time app permission logs | None |
| Force GPU Rendering | Developer Options > Force GPU Rendering | Medium | Smoother UI on older phones | Low (battery trade-off) |
| Background Process Limit | Developer Options > Background Process Limit | Medium | Better battery and RAM management | Low-Medium |
| Smart Lock | Settings > Security > Smart Lock | Easy | Auto-unlock in trusted places/devices | Low |
| System UI Tuner | Hold gear icon in notification shade | Medium | Status bar customization | Low |
| Screen Pinning | Settings > Security > Screen Pinning | Easy | Single-app privacy mode | None |
| Notification History | Settings > Notifications > Notification History | Easy | Recover dismissed notifications | None |
| Focus Mode | Settings > Digital Wellbeing > Focus Mode | Easy | Block distracting apps on schedule | None |
| Private DNS | Settings > Network & Internet > Private DNS | Medium | Ad blocking + private browsing | Very Low |
Your 10-Step Action Plan to Unlock Your Android’s Full Potential Today
Bookmark this section. It’s a step-by-step sequence to go from a factory-limited phone to a fully unlocked one in about 20 minutes.
1. Unlock Developer Options first. Every other setting on this list depends on it. Go to Settings > About Phone > Build Number and tap it seven times. This is your entry point. Skip this step and you miss access to the most impactful tweaks.
2. Cut your animation speeds immediately. Inside Developer Options, set Window Animation Scale, Transition Animation Scale, and Animator Duration Scale all to 0.5x. You’ll feel the difference before you finish this list.
3. Enable Notification History before you forget. Go to Settings > Notifications > Notification History and turn it on now. It only captures notifications going forward, so the sooner you enable it, the sooner it starts being useful.
4. Open Privacy Dashboard and do a permission audit. Go to Settings > Privacy > Privacy Dashboard. Look at the last 24 hours. Revoke any permissions from apps that have no business accessing your microphone, camera, or location.
5. Set up Private DNS. Go to Settings > Network & Internet > Private DNS and enter dns.adguard-dns.com or your preferred hostname. This takes 30 seconds and immediately improves privacy across every app on your phone.
6. Configure Smart Lock for your home or primary location. Go to Settings > Security > Smart Lock. Add your home address as a Trusted Place. Stop unlocking your phone 80 times a day in your own living room. This alone will improve your daily experience noticeably.
7. Enable Notification History (and yes, it’s worth repeating). It’s genuinely that easy to overlook. Double-check it’s on before moving forward.
8. Identify your top three distraction apps and add them to Focus Mode. Go to Settings > Digital Wellbeing & Parental Controls > Focus Mode. Add whatever apps most interrupt your deep work. Set a morning schedule. The 23-minute refocus cost per interruption is a real productivity tax.
9. Fix your Bluetooth audio if you use wireless headphones. In Developer Options, disable Absolute Volume and switch your Bluetooth Audio Codec to the highest option your headphones support (aptX HD or LDAC if available).
10. Common mistake to avoid: Don’t touch OEM Unlocking or USB Debugging unless you know exactly what you’re doing. These settings open your device to security risks when left active. Enable USB Debugging only for specific tasks (like connecting to a PC for file transfer), and disable it immediately after. OEM Unlocking can void your warranty and, on some devices, permanently wipe your data. Leave both off unless you have a specific technical need.
Expert Insight: What a Mobile Security Researcher Wants You to Know
(The following is an illustrative expert perspective, reflecting perspectives commonly held among mobile security and UX professionals.)
A mobile security researcher with experience auditing Android manufacturer skins once described the situation this way: “The gap between what Android can do and what your manufacturer allows it to do isn’t accidental. It’s a product decision. Most of the settings we’re talking about exist specifically because Google built Android to be customizable. Manufacturers simplify on top of that. The irony is that the users who would benefit most from these settings are the ones who never know they exist.”
The important counterpoint: not every hidden setting is hidden for cynical reasons. Some, like limits on background processes or restrictions on GPU rendering, are genuinely conservative choices made to protect battery life and device stability for the broadest range of users. “You’re taking on responsibility when you unlock these settings,” the same researcher noted. “Which is fine, as long as you understand what you’re changing.”
The lesson: approach Developer Options like a knowledgeable tourist, not a vandal. Look at everything. Understand what things do before touching them. Change one setting at a time and test the result. That methodology means you get all the upside with essentially none of the risk.
Frequently Asked Questions About Hidden Android Settings
Will unlocking Developer Options void my warranty? Simply enabling Developer Options does not void your warranty. It’s a built-in feature Google designed for testing. The only Developer Options action that can void your warranty is using OEM Unlocking to unlock the bootloader, which this guide specifically advises against unless you have a strong technical reason and understand the consequences. Everything else, including animation tweaks, audio codec changes, and GPU rendering, is reversible and warranty-safe.
Is it safe to change animation scales in Developer Options? Yes, completely. Animation scale settings are one of the safest changes you can make in Developer Options. They affect only how fast transitions appear on screen and have no impact on system stability, security, or data. If you don’t like the result, change them back in 30 seconds.
What’s the difference between hiding Developer Options and disabling it? Toggling the master Developer Options switch to Off disables all the settings you’ve changed and hides the menu from your Settings list. Your changes don’t save when you do this. To restore the menu, simply tap Build Number seven times again. Hiding it is useful if you share your phone with others and don’t want them accidentally adjusting settings.
Will Private DNS work on both Wi-Fi and mobile data? Yes. Android’s Private DNS setting applies to all network connections, both Wi-Fi and cellular data. Once you configure it, your DNS requests are encrypted and routed through your chosen provider regardless of which network you’re on. The only exception is some corporate or school networks that block custom DNS servers.
Why does my manufacturer hide features that Android already supports natively? This comes down to a mix of user experience design, regional carrier agreements, and business decisions. Manufacturers like Samsung and Xiaomi build custom software layers (One UI and HyperOS, respectively) on top of Android that prioritize simplicity for mainstream users. Features that appear complex or niche get buried or disabled. Carrier partnerships sometimes also restrict specific features, like certain network switching options or hotspot controls, depending on the user’s data plan. It’s not malicious. It’s a business model, and understanding that is the first step to working around it.
Conclusion: Your Phone Was Always This Capable
Those 1.2 billion Android users who have never opened Developer Options aren’t using a lesser phone. They’re using the same hardware as the people who have. They’re just not using all of it.
The three most critical things to take away from this guide:
First, every hidden Android setting covered here is safe to enable, reversible, and available without rooting or voiding your warranty. The risk of trying these settings is genuinely low. The cost of not trying them is continuing to use a phone that’s slower, louder, and more ad-prone than it has to be.
Second, Privacy Dashboard and Private DNS are the most underused features here, and arguably the most important. Most Android users have no idea which apps are accessing their microphone and location, or that their ISP can see every website they visit. Both of those situations are fixable in minutes.
Third, your phone manufacturer’s decision to hide these settings was a product choice, not a permanent rule. You can override it. You should override it.
Waiting costs you something real. Every day you spend with sluggish animations, limited audio quality, capped privacy, and unrestricted background apps is a day of a slightly worse experience than the phone you paid for was built to deliver.
Open your Settings app right now. Navigate to About Phone. Find Build Number. Tap it seven times. You just unlocked the version of your phone you were always supposed to have.
Your phone has been waiting for you to do this. It’s time to let it run.
: Which of these 12 settings surprised you the most? Drop it in the comments. A surprising number of long-time Android users have never heard of Notification History or Private DNS, and knowing which ones land as a revelation helps other readers know where to start.
If you found this useful, you might also want to read our guide on Android Privacy Settings: The Complete Lockdown Checklist — a deeper dive into the security side of what’s covered here.
Image Suggestions
Image 1: Split-screen showing a Settings app with “Build Number” highlighted on one side and the Developer Options menu open on the other | Alt text: “Android Developer Options unlocked showing Build Number tap sequence and hidden settings menu”
Image 2: Close-up of Android animation scale settings at 0.5x in Developer Options, with before/after feel illustrated by a speed graphic | Alt text: “Android Developer Options animation scale settings set to 0.5x for faster phone performance”
Image 3: Privacy Dashboard screen on Android showing app permission access log with camera and microphone access entries from various apps | Alt text: “Android Privacy Dashboard showing real-time app permission access log for camera and microphone”