Stop Letting Your Camera Babysit Your Shots!
You’ve got a great camera — but are you actually squeezing every drop of magic out of it?
If you’ve ever wondered what separates a snapshot from a pro photo, Hidden Camera Settings That Instantly Take Pro Photos aren’t just “nice to have” — they’re game changers. Let’s pull back the curtain on the settings professionals quietly use to instantly elevate their images.
Grab your camera (or phone) — we’re about to unlock the kind of control that makes average photos pop like they were shot by an expert.

📍 Section 1: Get the Basics Right — The Exposure Triangle
When you hear pros talk about missing nothing, they’re usually talking about the exposure triangle — one of the core pillars behind hidden camera mastery:
- Aperture
- Shutter Speed
- ISO
Together, they control how your photo gathers light and creates the creative “look” you want. These three are the hidden levers behind every award-worthy shot you’ve ever loved. (whitewall.com)
📸 Why It Matters:
- Aperture affects depth of field (think dreamy backgrounds vs razor sharp focus). (whitewall.com)
- Shutter speed determines how motion is captured (freeze the moment vs artistic blur). (whitewall.com)
- ISO balances brightness and image noise. (Aftershoot)
Pro Tip: Start by choosing the look you want — then let your exposure triangle help you nail it.
🎯 Section 2: Manual Mode — Your Fastest Path to Pro Photos
Most photographers recommend leaving the camera in Auto only when you don’t yet want control. True mastery, however, happens in Manual Mode, where you make every decision. (B Hauz Productions)
🔥 Why Manual Mode Is a Game Changer
- You decide exactly how much light enters the camera.
- You control creative effects like motion blur, depth of field, and sharpness.
- You learn the language your camera speaks — and then you fluently command it.
Hidden Setting to Unlock:
Instead of leaving nearly everything on Auto, go into Manual Mode and set:
- Your ISO
- Your Aperture
- Your Shutter Speed
Then take your shot — tweak and repeat. You’ll be surprised how quickly that one thing your camera did for you before suddenly becomes something you wanted it to do all along. (Instructables)
🔍 Section 3: Key Camera Settings Pros Don’t Leave on Default
Out-of-the-box defaults are fine for snapshots — but professional images come when you personalize your camera’s behavior. Here are some settings pros never leave on default: (Fstoppers)
| Setting | Why It Matters |
|---|---|
| Metering Mode | Determines how your camera reads light — switch from average metering to spot for tricky lighting. |
| Focus Area | Default autofocus might choose the wrong subject — use single-point AF for precision. |
| Auto ISO Behavior | Leave Auto ISO alone and your shutter speed might tank — set limits so it never drops below a safe speed for sharp photos. |
| White Balance | Ensures accurate colors — manual white balance beats guessing every time. |
| Highlight Warnings (“Blinkies”) | Useful to spot overexposure before it’s too late. |
👉 These settings let you steer your image, not just hope for a good outcome.
🔦 Section 4: White Balance & Color Control — Beyond the Default
Ever shot indoors and wondered why your photos looked too orange or blue? That’s your white balance talking. When left to Auto, your camera guesses — and sometimes guesses wrong. (Multimedia Shop)
White Balance Hidden Tricks
- Use the Kelvin scale for precise color temperature control. (B Hauz Productions)
- Match preset white balance to your scene: Tungsten, Cloudy, Daylight, etc. (Video Envato Tuts+)
- For tricky mixed lighting, switch to custom white balance so your camera sees exactly what the light looks like.
Pro Move: If you shoot in RAW, you can fine-tune color in post without losing quality — making white balance less scary and more creative.
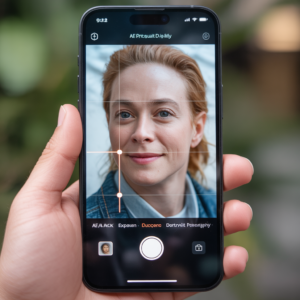
🧠 Section 5: Focus Modes — Sharpen What Matters Most
Every great photo has something that feels sharp. Whether it’s eyes in a portrait or a speeding car, how you focus matters. (B Hauz Productions)
Quick Focus Modes Breakdown
- Single-Shot (AF-S / One Shot): Ideal for still subjects. (B Hauz Productions)
- Continuous (AF-C / AI Servo): Great for moving subjects — keeps them crisp. (B Hauz Productions)
- Manual Focus: Offers pixel-perfect control when autofocus struggles. (Multimedia Shop)
Bonus Hidden Setting:
In many cameras, you can save custom focus modes tailored to your shooting style — so instead of fumbling mid-shoot, you hit one button and your perfect setup loads instantly. (propix.at)
🔍 Section 6: Metering Modes — The Secret Exposure Hacker
Metering mode decides how your camera measures light — and it’s often overlooked (even by eager amateurs). (Wikipedia)
📷 Types of Metering:
- Evaluative (Matrix): Good for balanced scenes. (Wikipedia)
- Center-Weighted: Great for portraits. (Wikipedia)
- Spot: Pinpoints a tiny area — perfect for tricky highlights or shadows. (Wikipedia)
When you control metering, you control your photo’s story. For instance, keeping your subject correctly exposed against a bright sky becomes much easier when you lock exposure using spot metering rather than letting the camera guess.
💡 Section 7: Bracketing & Advanced Exposure Techniques
Sometimes one photo just isn’t enough. That’s where bracketing shines — it takes multiple shots with varied exposure, letting you choose the best or merge them later. (Wikipedia)
That’s especially useful in:
- High contrast scenes
- Sunsets
- Product photography
- HDR composites
Even setting just three bracketed shots (normal, darker, lighter) increases your chance of getting the perfect one dramatically.
🏁 Section 8: RAW vs JPEG — Why Pros Choose RAW
Almost every seasoned photographer shoots in RAW, and for good reason:
- Maximum detail retention
- Greater control in editing
- Better dynamic range and color correction
Shooting RAW doesn’t take more skill in-camera — it just means you choose quality over compression. That decision alone can make your photos look pro with minimal effort.
⚙️ Section 9: Pro Timing Tricks — Speed, Bulb, & Priority Modes
Not all shots need full manual control — sometimes what you really want is targeted control. That’s where priority modes flex their muscles:
- Aperture Priority (Av/A): You choose f-stop — camera picks shutter speed. (Wikipedia)
- Shutter Priority (Tv/S): You pick shutter speed — camera sets aperture. (Wikipedia)
- Bulb Mode: Keep the shutter open for extended exposures (great for star trails). (Wikipedia)
Each of these puts more of your intent into the shot without overwhelming you with knobs and menus.
📣 Conclusion: Put It All Together
Hidden camera settings aren’t about collecting dusty skills — they’re about sculpting light, emotion, and story into every shot. Once you:
✔ Understand the exposure triangle,
✔ Own Manual Mode,
✔ Master focus and metering,
✔ And personalize your white balance & metering…
…you don’t just take photos — you craft them.
💥 Call-To-Action
If you found this guide useful, share it now or bookmark it for your next photo adventure. Want pro settings tailored to portraits, landscapes, or night shots specifically? Tell me your focus and I’ll craft a custom cheat sheet!
- Learn more about the exposure triangle and how it defines your image’s brightness and impact: WhiteWall’s Exposure Triangle Guide (whitewall.com)
- Discover why leaving defaults behind is key for professional results: Fstoppers Article on Camera Settings You Shouldn’t Leave Default (Fstoppers)
If you’d like settings for specific scenarios (e.g., portraits, night, sports), just ask!